Playing with a FreeRunner
USB networking between Linux and the FreeRunner
The process of connecting to the FreeRunner using TCP/IP over the USB link is well documented but here are the exact commands I use to setup the link.
sudo iptables -A POSTROUTING -t nat -j MASQUERADE -s 192.168.0.0/24

sudo sysctl -w net.ipv4.ip_forward=1

sudo ip addr add 192.168.0.200/24 dev usb0

sudo ifconfig usb0 up

scp /etc/resolv.conf root@192.168.0.202:/etc/resolv.conf
The official Wiki page on this subject is http://wiki.openmoko.org/wiki/USB_Networking.
Initial testing of the FreeRunner GPS
Screenshots I took while testing the GPS on the FreeRunner.
To make sure the GPS was functioning I followed the instructions from the OpenMoko wiki: http://wiki.openmoko.org/wiki/Howto_Test_Your_GPS_with_agpsui. Here are the screenshots of agpsui running on a FreeRunner sitting on the windowsill in my home office.
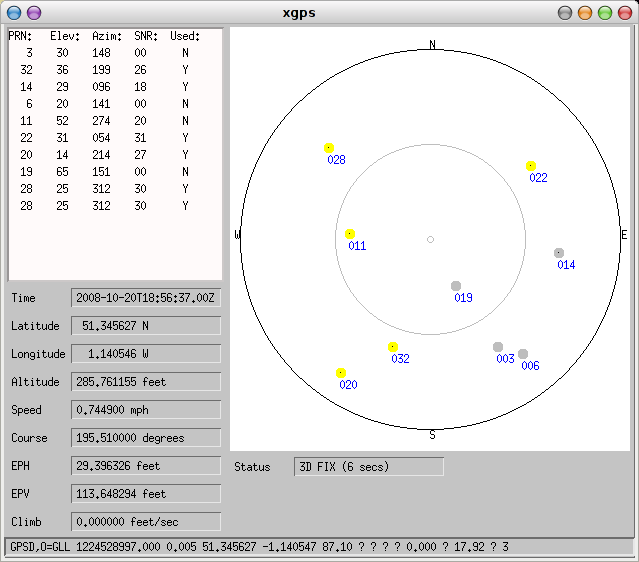
The first screen is a dump of various stats from the GPS. It shows you what the current state is.
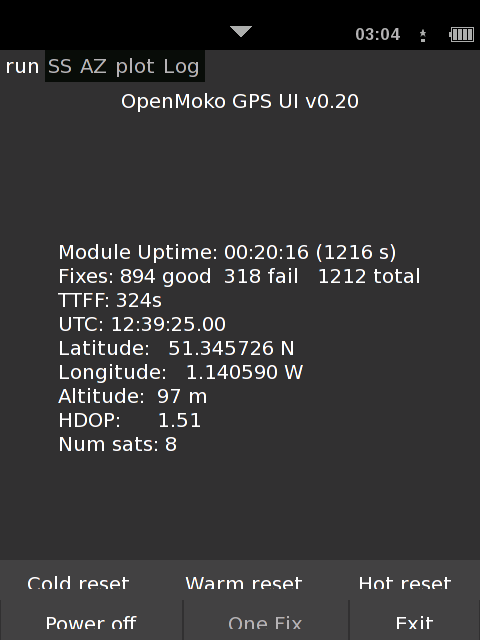
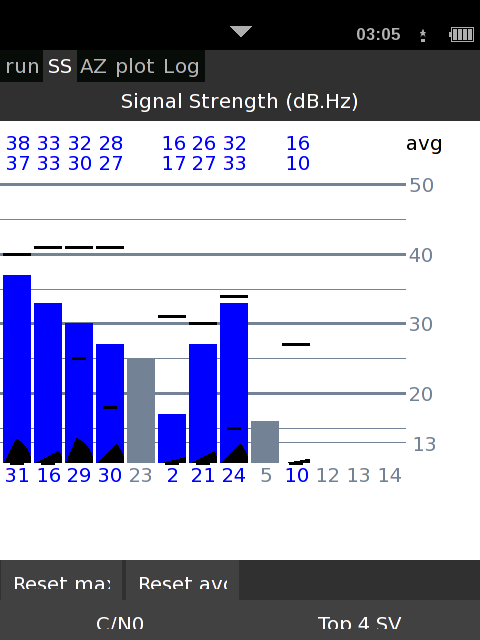
The GPS is seeing 8 satellites in this shot. This is more than you need for decent GPS information and quite a decent number for a device that only has a tiny internal antenna.
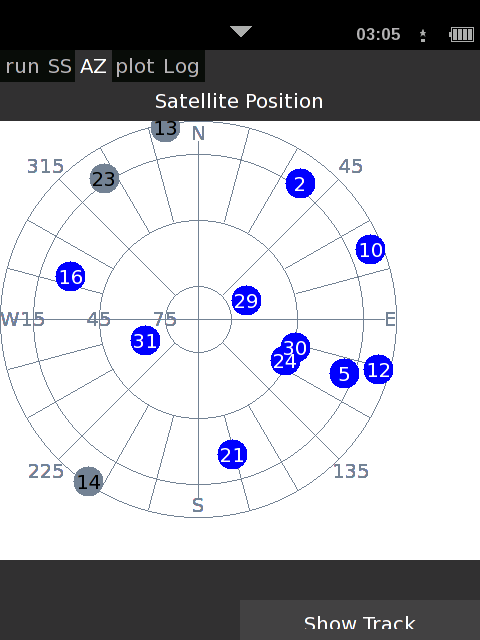
Finally we see the positions of the satellites the GPS can see. Not very useful to me but cool none the less:)
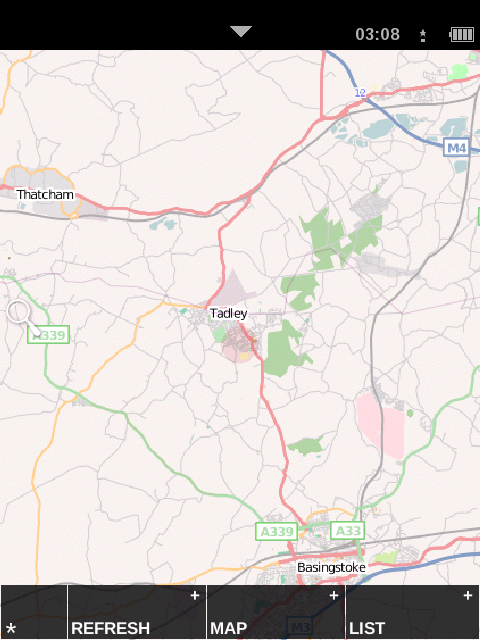
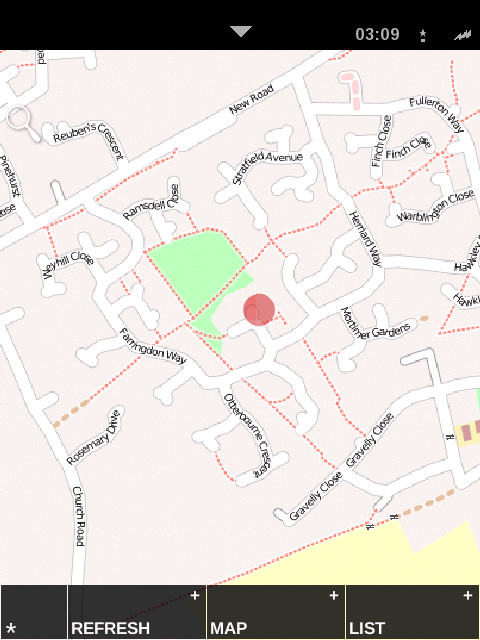
These next three screenshots show the output of the default GPS client you can run on the FreeRunner. I zoomed in a bit more for each picture, the maps were being downloaded on the fly from the Internet over a USB link between the FreeRunner and my laptop.

The final thing I did was install the GPS daemon on the FreeRunner and access it via the network. Here is xgps displaying the live information over the USB cable. On Gentoo xgps somes as part of the ‘gpsd’ package.
Flashing the Neo FreeRunner with a new OS
This post describes how to back up a FreeRunner and install the Om_2008.9 OS on it.
There are a bunch of articles and wiki pages describing how to to do these things, this page has my terse notes so I can look up what I did when I want to. The machine I used was running Gentoo Linux.
First I downloaded the tool to upload images to the phone as well as the new images.
wget http://downloads.openmoko.org/releases/Om2008.8-update/dfu-util

wget http://downloads.openmoko.org/releases/Om2008.9/Om2008.9-gta02-20080916.rootfs.jffs2

wget http://downloads.openmoko.org/releases/Om2008.9/Om2008.9-gta02-20080916.uImage.bin

wget http://downloads.openmoko.org/releases/Om2008.9/Om2008.9.splash.gz
Rather than going in guns blazing I thought I would backup the factory defaults. This also allowed me to check that the tool used to upload images to the phone worked in a sane way before ruining the phone. Before you can use the dfu-util you need to reboot your phone and stop it from loading the OS. With the phone off, hold down the ‘aux’ button on the side and press the power button, you will end up at the boot loader. Then press ‘aux’ to cycle through the menu and enable the USB console (press power to select it). The boot loader has a timeout of 30 seconds so either type fast or press ‘aux’ every 10 seconds or so.
sudo ./dfu-util -a kernel -R -U good-kernel.bin

sudo ./dfu-util -a rootfs -R -U good-rootfs.jffs2

sudo ./dfu-util -a splash -R -U good-splash.bin

sudo ./dfu-util -a u-boot -R -U good-u-boot.bin

sudo ./dfu-util -a u-boot_env -R -U good-u-boot_env.bin
The rootfs image is 256mb, this took longer than I cared to watch it for to copy on my machine. After the backup you can use dfu-util to upload the new OS images:
sudo ./dfu-util -a kernel -R -D Om2008.9-gta02-20080916.uImage.bin

sudo ./dfu-util -a rootfs -R -D Om2008.9-gta02-20080916.rootfs.jffs2

sudo ./dfu-util -a splash -D Om2008.9.splash.gz
If you get a message like No such Alternate Setting: “kernel” make sure you running dfu-util as root.